Upgrading memory and storage in a mini PC
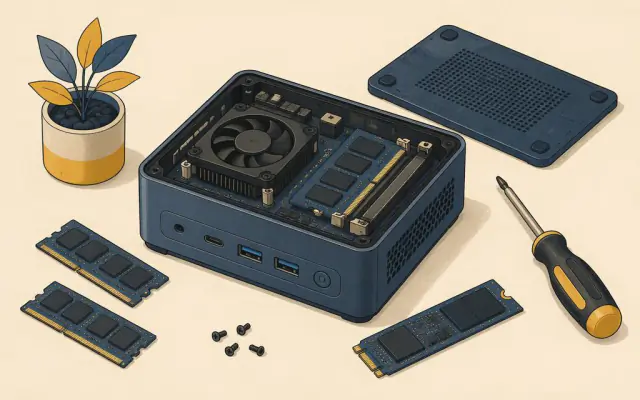
One of the best things about many mini PCs is that the two parts most likely to feel too small after a few years, memory and storage, can be replaced in minutes. Here is how to find out what your model takes and how to do the job without damaging anything.
Step 1: find out what is inside
Before ordering any parts, check three facts:
- Memory type and slots. Look in the manual or the manufacturer's support page for "SO-DIMM", the number of slots and the maximum supported capacity. If it says LPDDR4x or LPDDR5, the memory is almost certainly soldered and cannot be changed.
- Memory generation. DDR4 and DDR5 modules are not interchangeable; the notch sits in a different place. The speed rating matters less, since the computer will run faster modules at its own supported speed.
- Storage slots. Look for "M.2 2280 NVMe" (the most common size: 22 mm wide, 80 mm long) and whether there is a second M.2 slot or a 2.5-inch SATA bay. Some small models use the shorter 2242 or 2230 size.
On Windows you can also see the current memory in Task Manager under Performance, and the installed drive in Device Manager. Free system information tools list slot counts too.
Step 2: buy the right parts
- Memory: match the generation (DDR4 or DDR5) and form factor (SO-DIMM). For two slots, buy a matched pair of the same size so the computer can use both channels, which improves graphics performance noticeably on chips with built-in graphics.
- Storage: an NVMe SSD of the right length. A PCIe 4.0 drive works in a PCIe 3.0 slot, just at the slower speed. If the drive will sit in a tight space, a model without a large heatsink is easier to fit.
Step 3: prepare
- Back up anything important.
- If you are replacing the system drive, decide whether you will clone the old drive or do a clean install. Cloning needs a USB enclosure for the new drive; a clean install needs a USB stick with the installer and, for Windows, a digital licence linked to your account.
- Shut the computer down fully and unplug the power brick. Press the power button once to drain any remaining charge.
Step 4: open and swap
Most mini PCs open from the bottom: four rubber feet or screws, then a plate that lifts off. Some have a ribbon cable for a 2.5-inch bay attached to the lid, so lift slowly and do not pull it.
- Touch a bare metal surface to discharge static before handling parts.
- Memory: push the metal clips at each side of the module outwards and it pops up at an angle. Slide the new module in at the same angle until the gold contacts disappear, then press down until the clips click.
- Storage: remove the single small screw at the end of the drive, lift the drive to about 30 degrees and slide it out. Insert the new one at the same angle, press it flat and replace the screw. Keep any thermal pad in place.
Step 5: first boot
The first start after a memory change can take longer while the computer trains the new modules; the screen may stay black for a minute. Check the new capacity in the system settings. If a new system drive does not appear, enter the firmware setup and confirm it is detected.
Warranty
In many regions, opening a computer to upgrade user-replaceable parts does not void the warranty on its own, but a "warranty void if removed" sticker can make claims awkward. Read your manufacturer's policy first, and keep the original parts in case you need to send the unit back.